Choosing the Ideal Sander for Your Walls
Sanding a wall before painting or renovating is crucial for achieving a professional finish. This guide helps you choose the right sander for your project, ensuring optimal results.
Sanding a wall before painting or renovating is a step that should not be overlooked. It is often the difference between an amateur result and a finish worthy of a professional. However, faced with the diversity of available tools, many individuals find themselves at a loss when it comes time to make their choice. Wall sanders, orbital sanders, belt sanders, triangular sanders… each model meets a specific need, and using the wrong tool can not only significantly prolong the work time but also damage the surface being treated. Fabien, a specialist in real estate renovation for over fifteen years, has seen many projects where the choice of inappropriate tools turned a day of work into a true marathon. This practical guide is designed to help you see clearly, identify your real needs, and choose the tool best suited to your project, whether it's renovating a small damaged area or preparing all the walls of a home for a complete repaint.
- The wall sander is the go-to tool for sanding large wall surfaces or ceilings without a ladder.
- The orbital sander is perfect for medium-sized surfaces and offers a smooth finish.
- The manual sanding block remains a viable option for small localized touch-ups.
- The grit of the abrasive should be selected based on the material and the desired finish.
- Power, weight, and the length of the telescopic arm are decisive criteria for significant work.
- An integrated dust extraction system greatly improves work comfort and limits airborne dust.
Why Sanding a Wall Before Painting is Essential
Many rushed DIYers tend to skip the sanding step to save time. This is a classic mistake, often costly to correct afterward. A poorly prepared wall does not hold paint well, leading to surface irregularities, premature peeling, or unsightly marks visible even after several coats of paint.
Sanding serves several essential functions. First, it removes old layers of blistered or poorly adhering paint, smooths out rough spots left by patching work, and creates a slightly rough surface that promotes adhesion of new layers. If you have recently patched holes in the wall, sanding these areas is absolutely necessary to achieve an invisible result once the paint is applied.
On plaster surfaces, sanding must be done carefully to avoid gouging the material. A grit that is too coarse can damage the surface instead of preparing it. Conversely, a grit that is too fine will not be effective enough to eliminate the reliefs. Therefore, the choice of abrasive is just as important as the choice of the sander itself.
A clean, dry, and properly sanded wall guarantees paint that lasts over time. It is a time investment that pays off greatly over the lifespan of the final result.
The Different Types of Sanders for Walls and Their Specific Uses
Not all walls are alike, and not all projects require the same level of equipment. Before investing in a tool, it is useful to take a precise inventory of what needs to be accomplished: total surface area to be sanded, type of material, accessibility of areas, ceiling height, and expected final result.
The Wall Sander, Queen of Large Wall Projects
For large-scale work, the wall sander, also known as a wall sander, is the most suitable tool. Its long telescopic handle, which can reach two to three meters depending on the model, allows access to high areas without the need for a ladder. This is a considerable advantage for both safety and speed of execution.
This tool is particularly effective for preparing plaster surfaces before a complete repaint. Its large diameter circular pad quickly covers wide areas, and most recent models include a dust extraction system connected to a construction vacuum, significantly limiting the dispersion of fine dust in the room.
The only point of caution concerns its weight and bulk. While the length of the arm facilitates access to high areas, it also makes the tool less maneuverable in small spaces or corners. Nevertheless, for an apartment to be fully renovated, this is the investment that saves the most time.
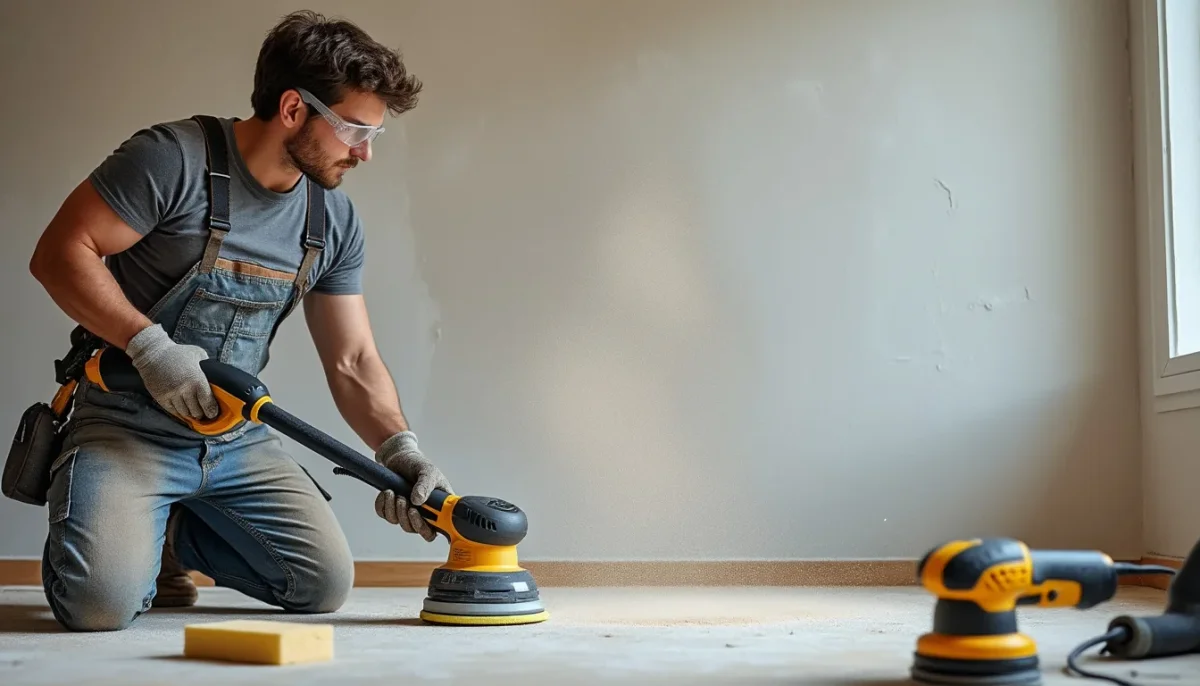
The Orbital Sander for a Neat Finish
The orbital sander, more compact and lightweight, is ideal for medium-sized surfaces and precise finishes. Its orbital motion combined with an eccentric rotation avoids the circular marks often left by other types of sanders, making it a particularly appreciated tool for finishing work before painting.
It adapts well to both walls and wood surfaces, giving it interesting versatility for DIYers undertaking various types of projects. If you are likely to work on different surfaces during the same project, the orbital sander offers a good compromise between performance and practicality.
The Manual Sanding Block and Manual Solutions
For localized touch-ups, such as smoothing a patched area or correcting a small imperfection, the manual sanding block remains a perfectly sufficient solution. Paired with appropriately gritted sandpaper, it allows for precise intervention without cumbersome electrical equipment.
Some models of sanding blocks are equipped with an integrated dust extraction system that captures the dust produced during sanding. A detail that changes the quality of work, especially in a lived-in or poorly ventilated room.
Choosing Your Sander According to the Surface to be Treated and the Type of Material
The type of material constituting the wall directly influences the choice of tool and abrasive. A plaster wall does not require the same precautions as a concrete partition or a wood surface. Identifying the nature of the substrate is therefore an essential preliminary step.
For concrete or cement surfaces, an electric belt sander can be used. More aggressive in its action, it removes more material and adapts to hard substrates. However, it requires more frequent replacement of abrasives, which wear out quickly when in contact with these resistant materials. If you are also planning to paint exterior concrete, know that prior sanding of the surface directly conditions the adhesion and durability of the applied paint.
On plaster, it is advisable to use medium-grit abrasives, between 80 and 120, for a first pass, then finish with a finer grit, between 150 and 180, to achieve a perfectly smooth surface. Excessive pressure during sanding can gouge the plaster and create new irregularities, which is counterproductive.
For wood partitions, the orbital sander is generally recommended. It allows for a homogeneous surface without scratching the wood grain. If you are also looking to remove paint from wood, mechanical sanding remains one of the most effective methods, provided you choose the right grit and proceed gradually.
The Technical Criteria Not to Overlook Before Purchase
Once the type of sander is identified, it remains to refine the choice according to the technical characteristics of the model. On the market, the differences between two devices in the same category can be significant in terms of comfort, efficiency, and durability.
Power and Rotation Speed
The power of a sander is measured in watts and determines its ability to maintain a constant speed even under pressure. For occasional domestic use, a power of 500 to 700 W is generally sufficient. For intensive or repeated work, it is better to aim for over 800 W to avoid overheating the tool and loss of efficiency during the project.
The adjustable rotation speed is a significant advantage. It allows you to adapt the intensity of sanding according to the fragility of the substrate and the desired finish. On delicate plaster, a speed that is too high can cause difficult-to-repair damage.
Weight and Ergonomics
Sanding a wall for several hours is a physically demanding activity. The weight of the tool plays a central role in user comfort, especially for wall sanders used at height. A tool that is too heavy quickly fatigues the arms and back, which impacts the quality of the work.
The ergonomics of the handles, the flexibility of the power cord, and the quality of the abrasive attachment are all details that make a difference on a real job site. These elements are only visible in use, hence the importance of getting advice from a specialist before purchase.
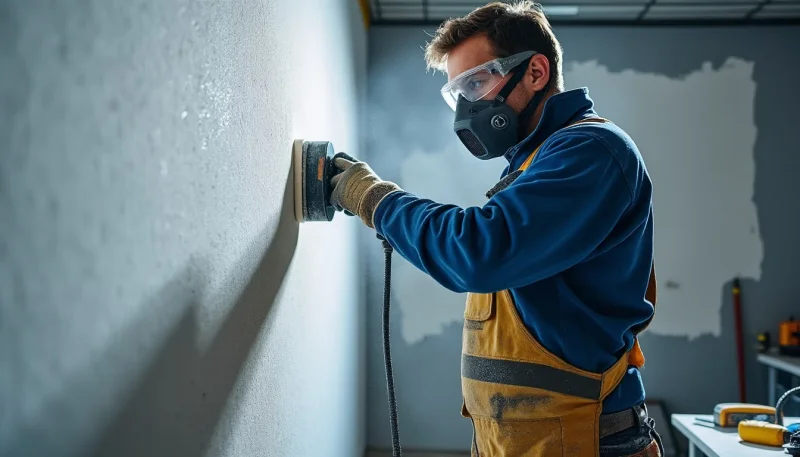
Integrated Dust Extraction System
The dust generated by sanding a wall is fine, abundant, and difficult to eliminate once it has settled everywhere in the room. An integrated dust extraction system, coupled with a construction vacuum, radically changes working conditions. This not only limits dust dispersion but also reduces cleaning time after sanding, and most importantly, protects the respiratory system.
Wearing an FFP2-type dust mask remains mandatory, even with a high-performance dust extraction system. Hearing protection is also recommended for prolonged sanding sessions.
Practical Tips for Successful Wall Sanding
Having the right tool is one thing. Knowing how to use it correctly is another. A few good practices can help achieve a professional result, even without prior experience in renovation work.
The first rule is to prepare the surface before sanding. This means removing fasteners, nails, screws, and any protruding objects that could damage the abrasive or create risks. It is also essential to protect the floor with a tarp, mask electrical outlets, and close ventilation ducts to prevent dust from infiltrating.
It is advisable to start with a coarse grit to eliminate significant reliefs, then gradually move to finer grits to smooth the surface. This multi-step process ensures a homogeneous result and avoids leaving visible marks under the paint.
The movement of the sander should remain steady and continuous, without stopping on the same area, to avoid gouging the surface. On walls, it is preferable to work in slow vertical or circular movements, gradually advancing from top to bottom or left to right depending on the room's layout.
Remember to regularly check the condition of the abrasive and replace it as soon as it shows signs of wear. A worn abrasive no longer sands effectively and can even scratch the surface unevenly. For work on large wall surfaces, it is useful to have several spare discs on hand before starting.
Finally, once sanding is complete, it is essential to thoroughly dust the surface.