Removing Adhesive from Tiles: Effective Methods
Removing adhesive from tiles can be challenging. Discover effective methods for tackling both fresh and dried adhesives, and learn how to protect your tiles during the process.
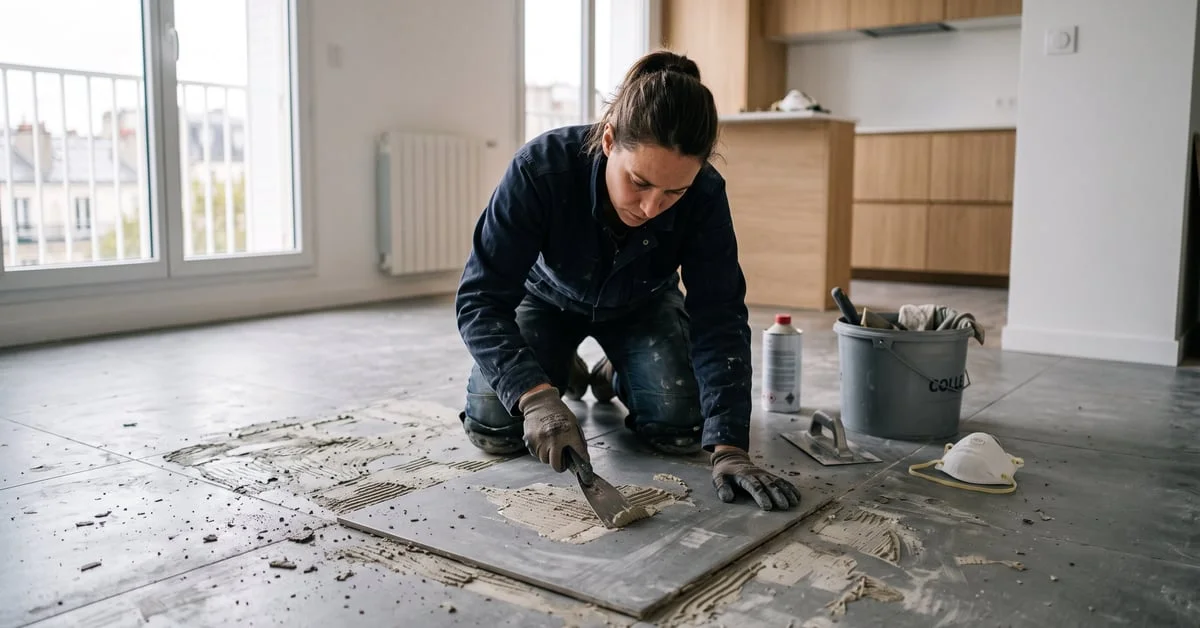
Removing adhesive from tiles is a common challenge faced by many, whether due to a poorly executed DIY installation, excess overflow between joints, or remnants left after removing an old covering. The critical factor is that allowing the adhesive to dry can turn a quick fix into a lengthy project. The method you choose will depend significantly on the type of adhesive and its condition.
Before starting, it's essential to identify two key aspects: the type of adhesive (cement-based, epoxy, silicone, or vinyl) and its state (fresh or dried). These factors will determine the approach you take.
Identifying the Adhesive Before Acting
Common Types of Adhesive
Not all adhesives can be removed in the same manner. Misidentifying the adhesive can lead to damaging the tiles or wasting valuable time.
- Cement-based adhesive (thin-set mortar): This is the most common type used for both wall and floor installations. Once dried, it becomes as hard as stone.
- Epoxy adhesive: This two-component adhesive is chemically resistant and can be very difficult to remove once hardened.
- Silicone: Flexible and either transparent or white, it is generally used for sealing joints. It can be removed in a film if done correctly.
- Vinyl or PVA adhesive: Typically used for underlays or light assemblies, it is water-soluble before fully drying.
💡 Tip: If unsure about the type of adhesive, test a discreet area with hot water. If it softens, it’s likely cement-based or vinyl. If it remains hard, you’ll need solvents or mechanical scraping.
Fresh or Dried: It Makes a Difference
Fresh adhesive can usually be removed with just hot water and a sponge, while dried adhesive requires specific tools and products. The golden rule is to not wait. Whenever you notice overflow during installation, wipe it immediately with a damp cloth. Five seconds of action now can save you five minutes later.
⚠️ Removing Fresh Adhesive: Quick and Simple
The Hot Water Method
For fresh cement or vinyl adhesive, pour hot (not boiling) water over the affected area. Let it soak for 2 to 3 minutes, then scrub with an abrasive sponge or microfiber cloth using circular motions. Rinse afterward. In 90% of cases, this method is sufficient if you act within an hour of application.
For fresh silicone, take a different approach: do not wet it. Allow it to form a light crust (20 to 30 minutes), then gently peel it off with your fingers or a flexible rubber spatula. It typically comes off in one piece.
✅ Remember: Fresh adhesive = hot water + quick action. No need for harsh chemicals. In most cases, intervention within 30 minutes is all that’s needed.
Mechanical Scraping: The Right Tools
Dried tile adhesive is almost as hard as concrete. Here’s what you’ll need:
- Stiff steel spatula: Ideal for thick residues, scraping at a low angle (15-20°) to avoid scratching the tiles.
- Razor blade scraper: Perfect for polished or glazed tiles, it glides without scratching.
- Orbital sander with an 80-grit disc: For larger surfaces with stubborn residues, to be used as a last resort.
- Heat gun: Softens epoxy and some vinyl adhesives to facilitate scraping.
⚠️ Caution: Avoid using overly aggressive metal tools on glazed or matte ceramic tiles, as scratches are irreparable. Always test in a discreet area before tackling the main section.
Suitable Chemical Products
When scraping is insufficient, chemical products can help. Choose according to the adhesive type:
- Mortar adhesive remover (diluted hydrochloric acid): Effective on cement residues. Use gloves and goggles, ensuring good ventilation. Let it act for 10 minutes, then rinse thoroughly.
- Acetone or nitro thinner: For hardened epoxy adhesive. Apply to a cloth and scrub small areas. Repeat as necessary.
- Silicone remover gel (like Rubson Décap’ Silicone): Softens hardened silicone in 30 minutes for clean removal with a spatula.
10 min
time required for an acid remover to act on mortar adhesive residue.
Special Case: Removing Adhesive Residues After Tile Removal
The Wall or Floor is Covered with Old Mortar
If you’ve just removed old tiles and the substrate is covered with adhesive residues, this is the most common scenario in renovations. Two approaches depend on the extent of the residues:
- Chisel or jackhammer: For large floor areas, a chisel (diamond disc mounted on a grinder) can level the mortar in just a few passes. This professional technique is often available for rental.
- Self-leveling compound: If the residues are thin and the substrate is sound, there’s no need to remove everything. A self-leveling compound can cover irregularities and provide a flat surface for the new covering.
- Primer: Once the substrate is cleaned or leveled, apply a primer before the new installation. This enhances adhesion and minimizes the risk of future peeling.
Protecting Existing Tiles During Work
If you’re working near tiles you wish to keep, protect them with masking tape and kraft paper before starting. Ten minutes spent on protection can save you an hour of cleaning. If adhesive spills occur, act within five minutes—time is always against you with these products.
| Type of Adhesive | Fresh Solution | Dried Solution | |------------------|----------------|----------------| | Cement-based | Hot water + sponge | Scraper + diluted acid | | Epoxy | Immediate acetone | Acetone + heat | | Silicone | Light crust + manual removal | Silicone remover gel | | Vinyl (PVA) | Warm water + scrubbing | Extended hot water + scraper |
For further techniques on installation and removal, check our article on how to choose the right adhesive for your substrate and usage.
Frequently Asked Questions
Can white vinegar be used to remove adhesive from tiles?
White vinegar (8% acetic acid) can soften weak residues of fresh or slightly dried mortar adhesive, but its effectiveness is limited against well-adhered adhesive. It’s suitable for superficial traces on glazed tiles but ineffective on hardened epoxy or silicone. Opt for an appropriate remover once residues are substantial.
How to remove dried epoxy adhesive without damaging the tiles?
Start by softening the epoxy adhesive with a heat gun set to 80-100 °C for 2 to 3 minutes. Then gently scrape with a soft spatula or razor blade scraper at a low angle. If residues remain, apply acetone to a cloth and scrub small areas. Avoid pouring acetone directly onto the tiles to prevent damaging the joints.
How long should an acid remover act on tile adhesive?
A diluted hydrochloric acid-based remover (available in DIY stores as a gel) typically requires 10 to 15 minutes of contact to tackle mortar adhesive residues. Do not exceed 20 minutes: beyond that, the acid can attack the enamel or joints. Always rinse thoroughly with clear water after treatment and wear nitrile gloves and protective goggles.
What is the difference between removing adhesive from new and old tiles?
On new tiles, the adhesive is often still fresh or recent: hot water and a scraper are usually sufficient. In contrast, old tiles may have residues that have hardened over the years and may be calcified. This requires a combination of mechanical scraping and chemical products. Be cautious with old tiles, as their enamel may be fragile: always test your chosen method on a hidden area before addressing the entire surface.
Should a professional be called to remove adhesive from tiles?
In most cases, no. The techniques described (hot water, scraper, commercial remover) are accessible to a novice DIYer. A professional may be necessary when dealing with very large areas (over 20 m²), fragile or valuable tiles, or when improperly mixed epoxy creates a thick layer over the entire surface. Renting a diamond chisel often resolves the most severe cases without needing a craftsman.