Designing a Sloped Driveway: Tips and Solutions
Learn how to design a sloped driveway that minimizes risks while ensuring safety and durability. This guide covers slope measurement, layout adjustments, material selection, and drainage management.
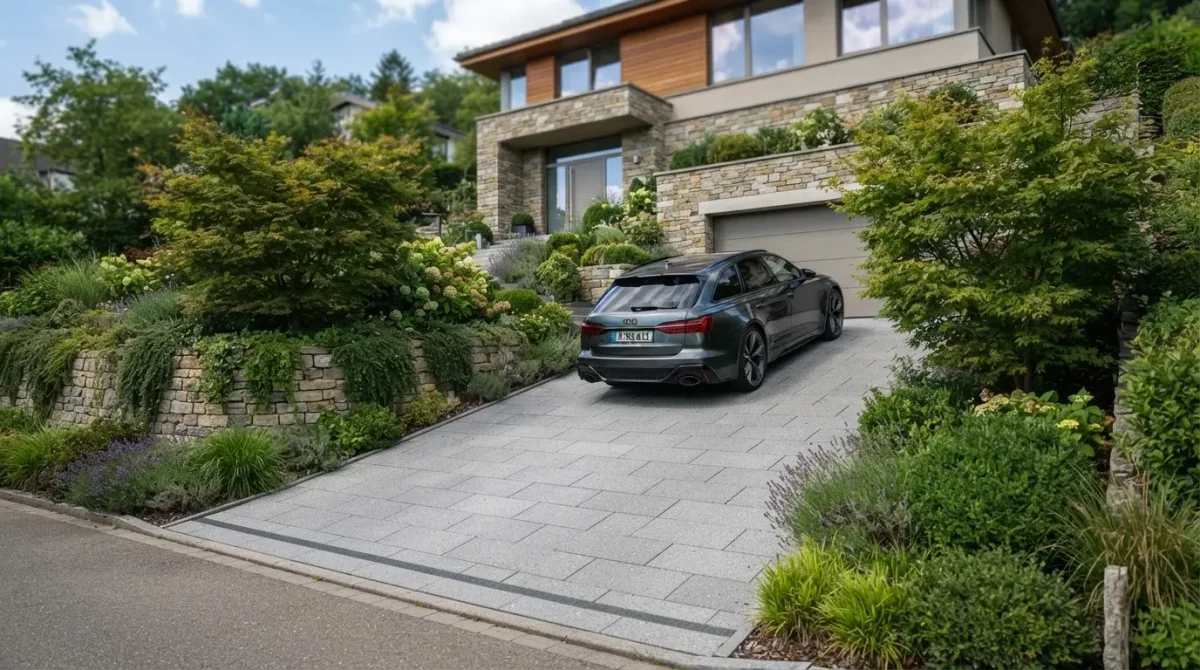
If your property features a slope and you're looking to create a sloped driveway that minimizes the risk of slipping or settling, this guide will help you measure the incline, adjust the layout, select appropriate materials, manage water flow, and estimate a realistic budget. The goal is to achieve a safe, durable, and cost-effective passage.
Key Takeaways
- Aim for a slope of 10 to 15% if possible, avoiding anything over 18% for residential driveways.
- Extend the layout with switchbacks or landings to reduce the gradient and enhance maneuverability.
- Choose a rough, draining surface: options include asphalt, exposed aggregate concrete, interlocking pavers, or well-contained stabilized gravel.
- Effective drainage is crucial: consider excavation, geotextiles, a cross slope of 1 to 2%, and drainage channels.
- Consult a professional if the soil is unstable, the slope is steep, or if earth retention is necessary.
Note: On a slope, the foundation of the project is more important than the finish. A beautiful surface laid on poorly prepared ground almost always ends up deforming. ✅
What is a Drivable Sloped Driveway?
Defining the Slope, Camber, and Access Constraints
A drivable sloped driveway is designed to support the weight of a vehicle while remaining accessible both uphill and downhill. The slope is calculated using the formula (elevation difference ÷ horizontal distance) × 100. For example, a 1-meter elevation change over 10 meters horizontally equals a 10% slope.
The camber refers to the lateral slope, which can complicate turns by destabilizing the vehicle. For residential driveways, it’s advisable to target 10 to 15%. Anything exceeding 18% makes traction, maneuvering, and water drainage more challenging.
If using unstabilized gravel, exercise caution; practical limits drop to around 5 to 7%, as the wheels can displace the material.
Understanding Risks for Vehicles on Slopes
When driving uphill, the primary risk is slipping: the wheel spins without adequate grip, particularly in wet conditions or with lighter vehicles. Conversely, descending poses dangers related to speed and braking, as overly smooth surfaces can exacerbate loss of control.
Additionally, poor water runoff can erode fine soil particles, leading to ruts and subsequent settling.
- Slipping when ascending, especially on wet surfaces.
- Undercarriage scraping on steep transitions.
- Erosion of edges and cracks in the surface.
Identifying Safety and Durability Goals
Your primary objectives should include traction, water drainage, and structural stability. Failing to achieve any of these aspects could lead to higher maintenance costs than anticipated. Therefore, approach the design as you would for a small technical road: a smooth layout, a solid foundation, and a finish suitable for local weather conditions. 👍
How to Analyze the Terrain Before Construction?
Measuring the Actual Slope and Identifying Steeper Areas
Do not rely solely on visual assessment. A slope may appear uniform while varying from 4% to 16% over a few meters. It’s best to measure at multiple points using a laser level, a mason's rule, or, if unavailable, a leveling app combined with a tape measure.
The aim is to pinpoint areas where you may need to extend the path or create a landing.
Multiple measurements are preferable to a single one, as the steepest section often dictates the entire project.
Observing Soil Type and Water Flow
A clay soil retains water and compacts when swelling and drying. A sandy soil drains better but may lack load-bearing capacity. A backfilled area can be heterogeneous, necessitating additional reinforcement of the base layer. Also, observe where water accumulates after rain; if it pools in a depression, avoid placing your driveway there without enhanced drainage.
Reminder: Before excavation, check for buried utilities (electricity, gas, water). Piercing a pipeline is far more costly than taking a few hours to locate them.
Checking Site Constraints and Construction Access
The construction site must accommodate earthmoving machinery, material deliveries, and, if necessary, debris removal. Consider trees, fences, existing drainage points, and property boundaries. The narrower the access, the more you need to plan for maneuvering and material cuts.
This is often where the budget increases, rather than on the surface material itself.
How to Adjust the Layout for a Sloped Driveway?
Lengthening the Path to Reduce Gradient
The most effective solution for designing a sloped driveway is to lengthen the path. By increasing the horizontal distance, you mechanically reduce the slope. In practical terms, a straight and short path can transform into a longer route that is much easier to navigate.
This often strikes the best balance between safety and durability.
I also recommend smoothing transitions at the top and bottom of the slope: maintain a gentle incline of around 5 to 6% over 2 to 4 meters. This approach enhances comfort and minimizes the risk of scraping the bumper.
If you enjoy visualizing leveling concepts, this video on sloped terrain design is quite informative.
Creating Switchbacks or Hairpin Turns
When the slope is steep, switchbacks—broad turns that “return” along the slope—help to alleviate the steepness of the terrain. However, tight hairpin turns can make steering difficult and increase camber. Favoring smooth curves over abrupt changes is advisable.
The vertical curvature radius should ideally remain around 10 to 15 meters to prevent low vehicles from scraping.
Planning Rest Areas on Long Distances
For longer driveways, include a rest area: a short, nearly flat segment of about 5 meters. Every 25 to 30 meters, this helps to “break” the ascent, relieve engine strain, and simplify control in wet conditions. This feature is also beneficial if multiple vehicles share the same access.
Controlling Camber and Securing Turns
Camber should be carefully managed. If it exceeds 10% in a turn, consider a retaining wall below to stabilize the base. Otherwise, the material will eventually slip outward. If earth retention is necessary, refer to this useful guide on stabilizing a leaning stone wall: the same stability principles apply.
What Surface Should You Choose for a Drivable Sloped Driveway?
Selecting the right surface involves more than just aesthetics. On a slope, I prioritize a surface with a friction coefficient greater than 0.6, as this minimizes slipping in rainy conditions. For a garage driveway, the most reliable options remain asphalt, exposed aggregate concrete, and well-laid interlocking pavers.
| Surface | Main Advantage | My Verdict | |-------------------------------|--------------------------------------------|------------------------------------------| | Asphalt | Smooth and very drivable | Excellent for frequent access | | Exposed Aggregate Concrete | Neat appearance and rough texture | Very good choice for traction | | Interlocking Pavers | Repairable and durable | Reliable if installation is meticulous | | Stabilized Gravel / Cellular Slabs | Economical solution | Interesting on moderate slopes |
Drainable Asphalt or Hot Mix Asphalt
Drainable asphalt allows some water to pass through its open structure. The more traditional hot mix asphalt provides a uniform and durable surface when installed correctly. For a frequently used driveway, this often represents an excellent compromise between comfort, durability, and maintenance.
If you opt for this choice, also consider the drying time of hot mix asphalt before allowing vehicles on it.
For further insights on surfaces that manage water effectively, I recommend my dossier on permeable concrete for vehicle parking.
Exposed Aggregate Concrete
Exposed aggregate concrete involves removing the surface layer to reveal the aggregates beneath. The result is a rougher finish, which enhances grip. This is a solution I particularly favor for sloped driveways, as it combines strength, a clean appearance, and safety.
Typically, an approximate thickness of 12 cm is targeted for the drivable section.
Interlocking Pavers
Interlocking pavers fit together to distribute loads more evenly. They require a well-compacted base, often consisting of 15 to 25 cm of gravel or crushed stone. On a slope, a slight incline of 1 to 2% towards drainage is also necessary to prevent water from pooling between the joints.
Stabilized Gravel and Cellular Slabs
Stabilized gravel rests on a structure that prevents the stones from shifting. Cellular slabs achieve the same effect with cells that hold the aggregates in place. This is often the most economical solution for a budget-friendly drivable driveway, but it requires a reasonable slope and good edge containment.
Some cellular systems can handle very steep slopes, sometimes up to 45%, but this depends on the turning radius, soil type, and drainage considerations.
Surfaces to Avoid on a Slope
On a slope, steer clear of overly smooth or loose materials. Polished pavers, poorly finished concrete, or loose gravel become problematic, even hazardous. The main issue isn't just comfort; it's the loss of traction when rain arrives.
- Smooth pavers and highly polished surfaces.
- Untreated concrete or overly slick finishes.
- Unstabilized gravel beyond 5 to 7% slope.
How to Manage Water on a Sloped Driveway?
Planning for Excavation and the Base Layer
Excavation involves removing topsoil and loose layers. For a drivable area, depths of 30 to 40 cm are common, depending on the soil type. Following this, you create a base layer, which is a compacted foundation that distributes the vehicle's weight.
Without this base, the surface will crack or settle.
A 0/31.5 crushed stone mix is often used: this refers to a blend of particles ranging from dust to 31.5 mm, which compacts well. This provides a solid base under the surface material.
Installing a Drivable Geotextile
Geotextile is a technical fabric that separates the natural soil from the aggregate layers. It prevents soil from rising into the structure and also limits weed growth. For slopes, choose a drivable version that is robust enough to withstand puncturing.
Installation is straightforward: overlap the rolls and extend them up the sides before adding the gravel layer.
Creating a Cross Slope for Water Drainage
In addition to the main slope, I recommend a cross slope of 1 to 2%. In other words, the driveway should not be perfectly flat across its width; it should be slightly inclined to direct water to one side. This small adjustment makes a significant difference by preventing water from running down the middle and creating ruts.
Installing Channels, Drains, and Grates
A drainage channel is a linear trench, often covered with a grate. An inlet is the opening that collects water to direct it toward a drain, a network, or an outlet. For longer driveways, place a transverse channel approximately every 20 meters to slow the water's speed.
And if water cannot flow into the network, consider a drainage trench or a properly sized dry well for local rainfall.
The classic pitfall is neglecting these drainage strategies, which can lead to costly repairs down the line.