Effective Car Seat Cleaning Techniques for a Spotless Interior
Discover effective techniques for cleaning your car seats: professional tips, recommended products, and practical advice for a spotless result.
Achieving impeccably clean car seats, free from unsightly stains and lingering odors, is a goal that professional automotive detailers consistently meet. Their success lies not in inaccessible miracle products but in a disciplined approach: diagnose, vacuum, spot clean, deep clean, rinse, dry, and protect. This method can be adapted to various materials—fabric, leather, or alcantara—and different levels of dirt, whether using homemade solutions or specialized products. Here’s how to implement this process at home, step by step, without improvisation.
Key Takeaways
- Identify the material and type of stain before selecting a product: an incorrect choice can permanently damage fabric or leather.
- Thorough vacuuming is often the most underestimated step: without it, moisture can turn dust into embedded mud.
- Stains usually form from excess water or product; working from the edge towards the center and using products sparingly can help avoid this.
- Leather is sensitive to standing water and solvents: only pH-neutral cleaners and immediate drying preserve its suppleness.
- A mixture of baking soda and white vinegar remains an effective homemade solution for fabric, provided it is tested on a hidden area first.
Diagnosing the Seat and Preparing the Area
Before using any cleaning products, the first rule for detailers is to observe. A fabric seat stained with coffee requires a different treatment than a full-grain leather seat marked by grease. Identifying the material is therefore the top priority.
Fabric is the most common and tolerant of water-based solutions. Leather—whether pigmented or full-grain—does not handle excess moisture or strong acidic or alkaline products well. Alcantara, a microfiber material with a suede-like appearance often used in premium vehicles, is the most delicate of the three: it can deform with friction and can be marked by concentrated steam. If there is any doubt about the type of upholstery, the vehicle manual or a quick model search can clarify.
Next, assess the type of dirt:
- Recent dry stains (crumbs, dust, sand): often, vacuuming alone suffices.
- Fresh wet stains (coffee, juice, urine): immediate intervention is required, blotting before drying.
- Old ingrained stains (wine, oil, dried blood): a complete protocol with pre-treatment is necessary.
- General diffuse soiling (sweat, skin oils): surface cleaning of the entire seat is needed.
Once the diagnosis is complete, gather the appropriate equipment. Never start wetting before having everything on hand: interrupting a cleaning session to find a clean cloth can cause a product to dry on the fiber, creating precisely the stain you were trying to avoid. The minimum list includes several clean, dry microfiber cloths, a soft brush with either natural or synthetic short bristles, a vacuum cleaner with flat and brush attachments, and the chosen products based on the diagnosis.
A final precaution before beginning: test any new product on a hidden area—the back of the seat, under the seat, or the inner side of the backrest. Allow it to act for two minutes, wipe it off, and wait for it to dry completely. If the color holds and the texture remains intact, you can proceed with the entire area. This step takes less than five minutes and prevents irreversible damage. The workspace should be well-ventilated: some products (concentrated APC, fabric stain removers) release fumes best avoided in a closed cabin.
With the diagnosis made and equipment gathered, it’s time to tackle the often-overlooked yet crucial step: dusting and vacuuming.
Dusting and Vacuuming: The Game-Changing Step
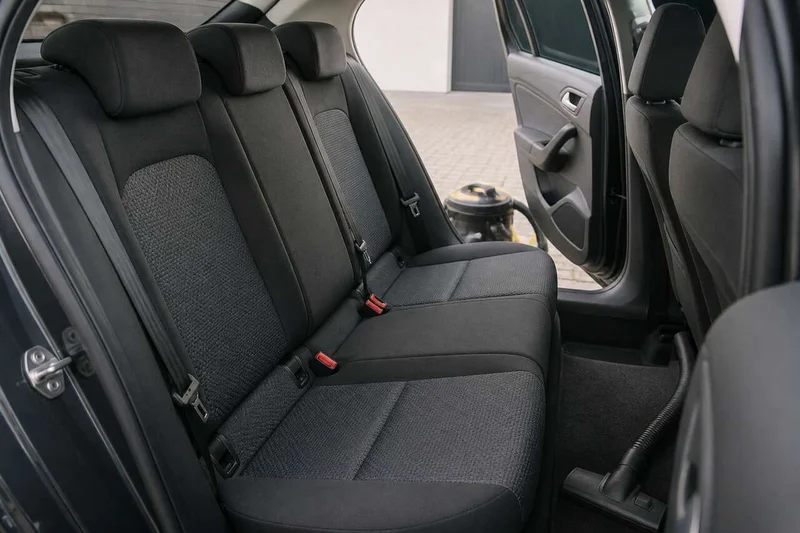
Vacuuming is not merely a preliminary formality; it is a technical step in its own right, and neglecting it can jeopardize the entire cleaning process. The physics are straightforward: as soon as a liquid is applied to a seat laden with fine dust, sand, or crumbs, these particles absorb moisture, forming a light mud that migrates into the fibers. The result, once dry, is a uniform grayish background that did not exist before cleaning.
The vacuum cleaner should be used with multiple attachments depending on the areas:
- The flat nozzle for seams, junctions between the seat and backrest, and adjustment sliders.
- The soft bristle brush for the main fabric surface, moving in several directions to loosen fibers and release deeply lodged particles.
- The narrow flexible attachment for corners beneath the seat, spaces between the seat and center console, and lateral vents if the seat is ventilated.
For fabric seats, it is beneficial to first use a dry soft brush to dislodge stuck fibers and bring particles to the surface before vacuuming. This dual action—brushing then vacuuming—is standard in professional preparations. For leather or alcantara, simply using the brush attachment with very light pressure is sufficient to avoid scratching the surface.
Don’t forget the underside of the seat, often loaded with road dust and debris from clothing. This area, usually invisible in daily use, can harbor allergens and odors that circulate into the cabin each time the heating or ventilation is used.
A thorough and methodical vacuuming session takes between ten and fifteen minutes per seat. While this may seem lengthy, it is this investment of time that ensures the subsequent step—spot cleaning—will yield a clean result rather than redistributing a new layer of dirt.
Once the seats are completely free of dry material, you can confidently move on to the spot cleaning process—applying a precise method to avoid leaving any rings behind.
Spot Cleaning Without Leaving Rings: Method and Techniques
Rings are the hallmark of amateur cleaning. They occur when a diluted product migrates outward from a wet area while drying, carrying dissolved dirt and mineral deposits from the water with it. Prevention lies entirely in the technique.
The fundamental rule: work from the outside in. This prevents the cleaning solution from spreading beyond the targeted area. Use a clean, damp cloth and apply the cleaning solution in a controlled manner, ensuring that the cloth is not overly saturated. This careful approach minimizes the risk of creating rings as the area dries.
When dealing with stubborn stains, it may be necessary to repeat the process several times, always ensuring that the area remains damp but not soaked. After successfully removing the stain, follow up with a clean, dry cloth to absorb any remaining moisture and prevent any potential rings from forming.
Deep Cleaning Fabric Seats
For fabric seats, the deep cleaning process involves using a suitable upholstery cleaner. Apply the cleaner according to the manufacturer’s instructions, typically using a spray or foam application. Work the product into the fabric using a soft brush, allowing it to penetrate the fibers effectively.
After allowing the cleaner to sit for the recommended time, gently scrub the area with the brush, then wipe away any excess with a clean, damp cloth. Rinse the cloth frequently to avoid redistributing dirt. Once the cleaning is complete, ensure the seats are well-ventilated to expedite drying.
Cleaning and Maintaining Leather Seats Without Damage
Leather requires special care to avoid damage. Use a pH-neutral leather cleaner and a soft microfiber cloth. Apply the cleaner sparingly, focusing on one section at a time. Gently rub the cleaner into the leather, avoiding excessive moisture that can lead to cracking or stiffness.
After cleaning, dry the area immediately with a separate clean cloth. To maintain the suppleness of the leather, consider applying a leather conditioner after cleaning, ensuring it is also pH-neutral to avoid any adverse reactions.
Rinsing, Drying, and Professional Finishing Touches
After cleaning, rinsing is crucial to remove any residual cleaning agents. Use a clean, damp cloth to wipe the surfaces again, ensuring no product is left behind. Once rinsed, dry the seats thoroughly to prevent any dampness that could lead to odors or mold.
For a professional finish, consider using a fabric or leather protector to shield against future stains and wear. These products can enhance the durability of the material and keep your seats looking their best.
Choosing Between Homemade and Professional Products
When deciding between homemade solutions and professional products, consider the specific needs of your seats. Homemade solutions like baking soda and vinegar can be effective for light stains and general cleaning, but for stubborn or ingrained dirt, professional products may provide better results.
Evaluate the severity of the stains and the material of your seats before making a choice. In some cases, a combination of both methods may yield the best outcome.
When to Call a Professional Interior Cleaner
If the stains are particularly stubborn, or if you are unsure about the cleaning process, it may be wise to consult a professional. They have access to specialized equipment and products that can effectively address tough stains without risking damage to your seats.
FAQ
For additional questions about car seat cleaning and maintenance, consider researching common issues or consulting with professionals for tailored advice.