Home Pottery: Creative DIY Projects in 8 Steps
Discover how to create DIY pottery at home without a wheel or kiln. Learn about essential tools, techniques, and tips for crafting beautiful ceramic pieces.
Is a Pottery Wheel Necessary for Home Pottery?
No, you can create bowls and other DIY decorative items without a wheel.
Can You Pottery Without Firing?
If you work with so-called soft clay, a kiln is not required.
How Long Does Air-Dry Clay Take to Dry?
Depending on the thickness and size of the piece, it can take several days up to two weeks to dry.
Pottery can be a wonderfully calming and relaxing hobby for both adults and children, allowing you to unleash your creativity and create small works of art. You don’t need professional equipment like a pottery wheel or a kiln to get started. Here’s what you need for home pottery and some inspiration for your projects.
1. Pottery Without Firing – Is It Possible?
When starting pottery at home, you might hesitate to invest in expensive equipment like a kiln, which can cost several thousand euros. However, with the right type of clay, you can craft beautiful DIY ceramics without firing. Air-dry clay, also known as soft clay, is typically white but can be colored as desired.
This type of clay, referred to as Air Dry, Keramiplast, Keramtion, or modeling clay, consists of porcelain clay, water, cellulose, and binders. It is ideal for children and beginners and is easy to work with. You can find it in many online shops or at hardware stores.
Air-dry clay takes about two to four days to dry. If you want to speed up the drying process, you can use an oven, but this method is only partially recommended, as high heat can cause the clay to crack.
2. Essential Tools for Pottery
In the history of pottery, clay animal figures have been found in Moravia, dating back around 25,000 to 29,000 years. In East Asia, pottery has been practiced for about 20,000 years, with firing techniques developed around 3,000 BC in Mesopotamia.
For home pottery, you don’t need a wheel. Aside from your hands and the clay, you only require a few additional materials and tools.
You can find pottery kits for beginners online or purchase tools from a craft store or hardware store. Here’s what you’ll need:
- Rolling pin or clay roller for flattening
- Surface: silicone mats or baking paper can also work
- Brushes and acrylic paints for decoration
- Modeling tools and knives
- A bowl with water and a sponge
- Sandpaper for smoothing and refining
With this basic equipment, you can bring numerous ideas to life, such as decorative items like bowls, vases, or plates. Children can also create small figures, as well as pendants, jewelry, or candle holders.
Note: You cannot use air-dry clay to make food-safe dishes, as it is not waterproof. Tableware must be fired beforehand. Ceramics made from air-dry clay are suitable only for decorative purposes.
3. Tips and Tricks for Home Pottery
Before you start bringing your ideas to fruition, here are some tips and tricks to keep in mind while pottery at home:
- Cut the required amount of modeling clay from the block using wire. Knead the clay well to remove air bubbles.
- Uneven surfaces can be smoothed with a wet sponge.
- You can join individual pieces together. To connect them, mix some clay with water to create slip. Apply this to the pieces to bond them.
- Avoid rolling too thin: Edges, such as those of bowls, should be about 5 mm thick to prevent breakage.
- If you need to take breaks during your work, wrap the piece in a damp kitchen towel to prevent it from drying out.
- If you choose to dry your piece in the oven, place it in a cold oven rather than a hot one. Bake it for about two hours at 110 degrees.
- Before painting your piece, ensure it is completely dry. For a more vibrant color finish, you can prime it white first.
- Use a clay sealant to protect the color and make it more water-resistant.
4. Techniques: Easily Bring Your Ideas to Life
Learning pottery is not difficult at all. In the following sections, we will share some techniques along with instructions so you and your children can easily realize your creative ideas.
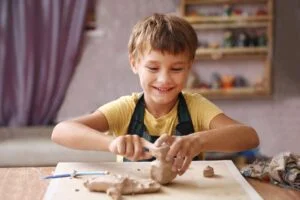
You can shape the clay into any desired form.
- Ball Technique: This method is excellent for bowls and small vessels. Start by shaping a ball. Press your thumb into the center to create a hole. Continue pressing around the edges with your thumbs to form the walls of your vessel. This technique is also great for modeling figures.
- Rolling Technique: Roll the clay with a roller into a flat sheet. Then shape it as desired. This method is also useful for connecting individual pieces – ideal for items with straight walls, like candle holders.
- Molding Technique: Use a bowl as a mold, lining it with plastic wrap. Place rolled-out clay inside and press it over the bowl’s edge. Smooth the inside to achieve a molded version of the original bowl.
5. Buy a Pottery Set for Home
No products found.