How to Secure and Adjust Bra Straps Effectively
Discover practical methods to secure and adjust bra straps effectively. Learn how to use clips, elastics, and sewing techniques to prevent slipping and enhance comfort.
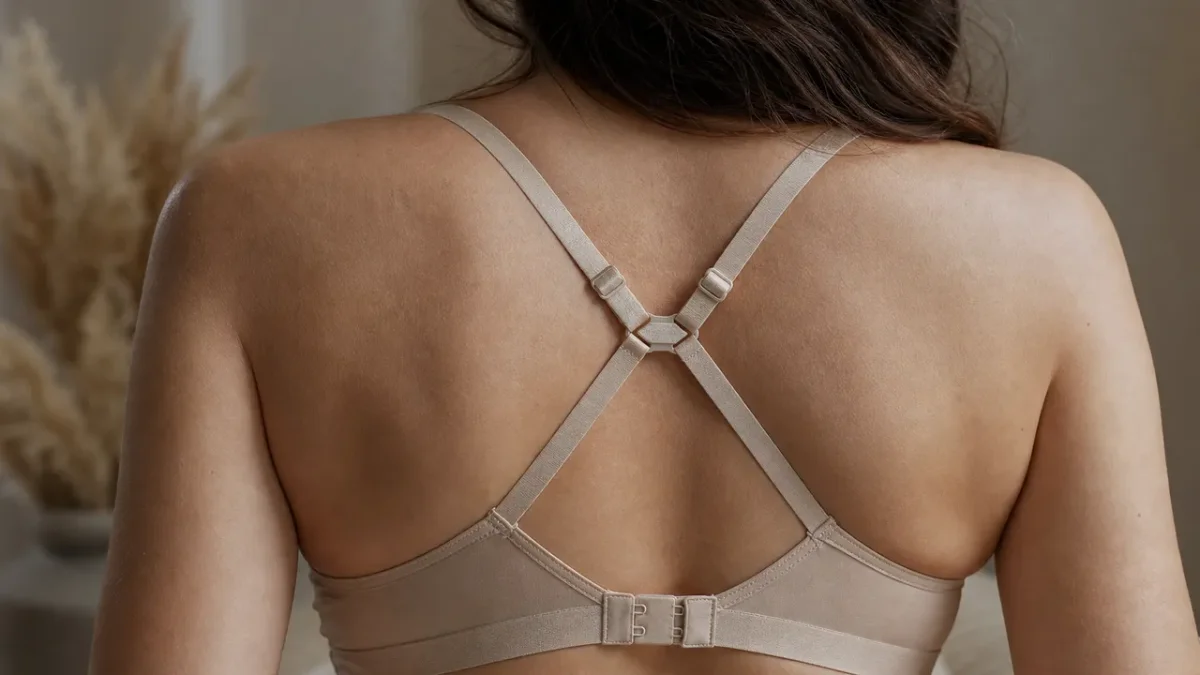
Bra straps that slip can quickly become a nuisance. Fortunately, there are several practical solutions to bring straps closer together or cross them, with or without sewing.
Explore the most effective methods, from specialized clips to quick fixes using a simple hair elastic.
How to Use a Clip to Cross or Bring Bra Straps Together?
The strap clip is easy to install on both straps without the need for sewing. Simply select a model that fits their width, whether you want to bring them together or cross them at the back.
Positioning and Securing the Clip Between Straps
Place the clip at the center of the back, between the shoulder blades. Insert each strap into its slot, ensuring they lie flat, then close the clip. After installation, adjust the strap lengths to prevent them from pulling on the shoulders.
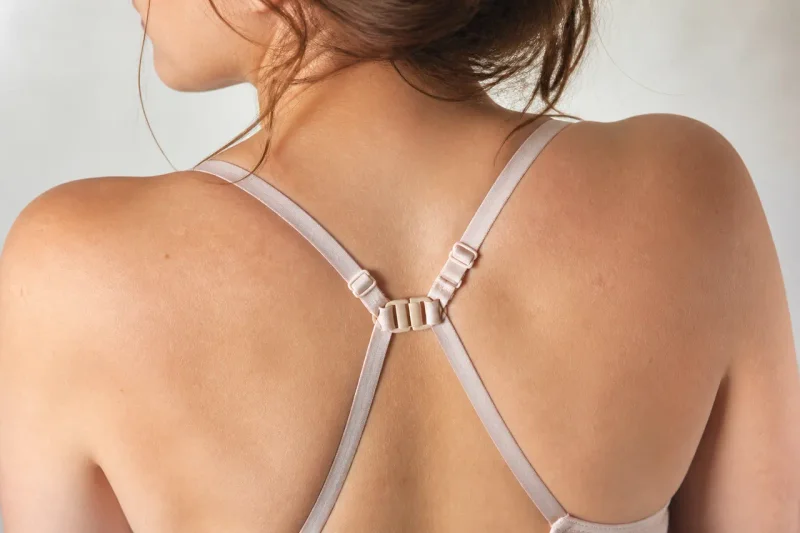
Some clips allow you to hide the straps under a racerback or specific garment cuts. They operate on the same principle but provide a more discreet hold and a neater finish.
The Hair Elastic Trick for Racerback Styles
A simple hair elastic can serve as a quick fix. Slide both straps through it, then pull it toward the center of the back to bring them together. While this is a temporary solution, it’s handy when you don’t have a suitable clip on hand.
How to Attach a Strap to the Inside of a Garment?
This attachment is fixed directly to the shoulder seam, inside the garment. The bra strap then clips onto it, remaining invisible from the outside.
The Sewing Method with a Snap Button
Bohin-style attachments combine a ribbon with a snap button. They are suitable for traditional straps and allow for easy securing. Follow these steps for proper installation:
- Try on the garment and locate where the bra strap sits on the shoulder.
- Sew the ribbon of approximately 8 centimeters onto the shoulder seam, inside the garment.
- Attach the female snap button to one end of the ribbon, with the male part facing it.
- Open the snap, slide the strap inside, and then close it to secure.
For a ribbon that fits the strap, allow about 3 cm more than its width. This margin prevents it from being too loose and ensures the strap stays securely in place.
The Quick Solution with a Safety Pin
Not in the mood to sew? An attachment can also be secured with a discreet safety pin, placed inside the garment at the shoulder seam. This setup is quick and effective.
However, ensure the pin is properly positioned to avoid discomfort or damaging the fabric.
How to Prevent Straps from Slipping or Falling?
Several tricks can help keep slipping straps in place. Silicone anti-slip tape, placed inside the strap, improves grip and minimizes movement on the shoulder.
Here are the most effective options to try based on your situation:
- Silicone tape adhered side against the skin for immediate grip without sewing.
- Safety pin fixed onto the shoulder seam of the garment, discreet and quick to apply.
- Snap attachment sewn inside the shoulder for lasting hold.
- Clip that gathers straps at the center of the back, limiting their spread toward the shoulders.
- Shoulder pads placed under the straps to distribute pressure and enhance stability.
If straps continue to slip despite these solutions, the issue may stem from the bra's fit. An overly wide underband can cause the straps to bear too much tension, encouraging them to shift.
How to Properly Adjust Bra Straps?
Adjusting straps is done using the sliders present on each strap. Slide the adjuster up to shorten and down to lengthen.
Start with the straps at their longest, then gradually adjust until you achieve a comfortable hold without pressure on the shoulders. Before making adjustments, properly position the breasts in the cups using the “scoop and swoop” method.
After adjusting, move your arms and upper body to ensure the bra stays in place. Also, check that the underband is snug enough to provide support without relying solely on the straps. To verify that you have the correct size, calculate your ideal bra size before making further adjustments.
What Mistakes to Avoid with Strap Attachments?
The primary mistake is shortening the straps too much to compensate for an overly wide underband. This does not resolve the issue and can even exacerbate discomfort while allowing the straps to slip.
Here are common pitfalls to watch out for:
- Sewing the attachment too high, near the neck, which can cause excessive pulling on the strap.
- Relying solely on the clip without adjusting the strap lengths, leading to continued slipping.
- Improperly positioning the safety pin, risking pinching the skin or it being visible.
- Neglecting to test movements after attaching, such as raising arms or twisting the torso.
- Counting only on silicone when the fit and size of the bra are also crucial.
One last detail to enhance comfort and aesthetics: a hook cover placed over the back clasps can smooth out contours under thin clothing. In a pinch, a small piece of tape slightly wider than the hook can also work.