How to Create a Decorative Rounded Wall Top: A Simple Guide
Learn how to create a clean and decorative rounded wall top with this simple guide. Follow the steps to trace a consistent radius, prepare a stable support, and finish effectively.
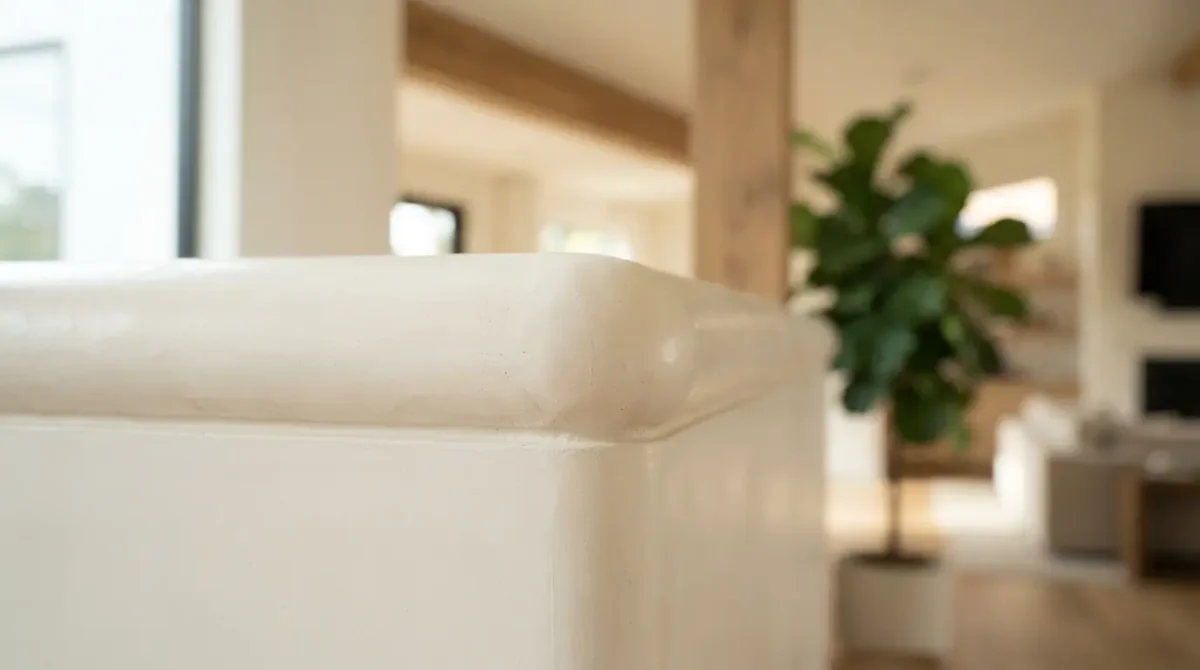
If you're looking to achieve a clean and decorative rounded wall top, this guide will walk you through a straightforward method: establishing a consistent radius, preparing a stable support, and finishing with mortar, plasterboard, or coating depending on your project. Indeed, the success of a beautiful curve largely hinges on initial execution.
To visualize the process, I recommend checking out a masonry tutorial that clearly demonstrates the tracing, formwork, and finishing of a rounded wall.
Key Takeaways
- A rounded wall top is fundamentally based on a consistent radius and reliable markers.
- The support must be solid, clean, and dust-free before any installation or adjustments.
- For outdoor projects, it’s advisable to design a shape that drains water rather than retaining it.
- When using plasterboard, a flexible framework and fine finishes yield the cleanest results.
- The secret to achieving a beautiful curve lies in working in layers and respecting drying times.
What is a Rounded Wall Top?
A rounded wall top is simply a curved finish at the top of a wall, as opposed to a flat or angular peak. This concept can be applied to garden walls, fence walls, or softer interior finishes. In decoration, this effect softens lines, which is often seen in the fundamentals of interior design.
Terminology: Rounded Wall, Curved Wall, Rounded Cap
The same principle is referred to by various names: rounded wall, curved wall, or rounded cap. The cap is the protective “hat” placed on top of an exterior wall. Inside, you’ll typically find a decorative curve made of coating, plaster, or plasterboard.
If you enjoy walls that serve as genuine decorative elements, consider reading about how to dress a bare wall without overcrowding the space.
Purpose of This Shape in Decoration and Outdoors
In decoration, it breaks the “hard angle” effect and creates a more fluid, softer impression. Outdoors, it primarily serves to protect the top of the wall: less stagnant water means a reduced risk of infiltration and degradation. Thus, a rounded wall top is often more than just an aesthetic choice.
Common Materials for Creating a Rounded Wall Top
Choosing the material depends on the usage: outdoor, indoor, mechanical load, or simple decoration. Here are the most common options:
| Material | Usage | Advantage | |-----------------|-----------------------------------------|-----------------------------| | Mortar / Concrete| Masonry wall, cap, exterior finish | Durable and strong | | Plasterboard | Decorative interior curve | Easy to shape | | Coating / Plaster| Repair and finishing angles | Smooth and clean finish | | Wood | Template, formwork, decorative piece | Easy to cut |
Preparing the Wall Before Starting
To truly succeed in creating a rounded wall top, do not skip this step. An irregular support will be immediately visible in the final curve. It’s also essential to check the structure if the wall is old or cracked, similar to how one would reinforce a leaning stone wall.
Checking the Stability of the Support
The wall must be stable: no crumbling parts, no detached areas, and no hollow-sounding sections. If a section crumbles, it must be repaired before considering the tracing. In masonry, remove anything that isn’t adhering; in plasterboard, check the framework, as a moving support will reveal flaws in the curve.
Cleaning, Filling, and Dusting
A dirty or dusty wall top will not adhere well. Clean, fill in holes, and dust thoroughly. If necessary, perform a leveling layer to correct minor irregularities. The goal is simple: to create a sound base before tracing or coating.
Choosing the Right Tools and Products
I recommend preparing the essentials before starting: tape measure, level, string, pencil, screws or nails, trowel, sponge, and depending on the project, adhesive mortar, finishing mortar, or plasterboard sheets. The more prepared your tools, the cleaner the radius will be.
- Tape measure and level to check markers.
- String or rope to trace the arc.
- Flexible corner or profile to guide the shape.
- Mortar or coating suitable for the support.
Tip: Before pouring or coating, create a small template from cardboard or plywood. This is the simplest way to verify the final shape without improvising on-site.
Tracing the Arc with a Consistent Radius
This is where it all comes together. A beautiful arc is not “eyeballed”; it is traced. I suggest starting from a clear center and maintaining a constant radius. For a gentle curve, a radius of 10 to 30 cm often works well for a small decorative curve. The larger the radius, the softer the curve appears.
Selecting the Center and Radius
The center is the point from which you measure the curve. The radius is the distance from this center to the line of the arc. If this point changes, the curve becomes irregular. Therefore, maintain a consistent measurement along the entire length, especially if the wall spans several meters.
Using String, Rope, or Compass
The simplest method involves fixing a string at a central point with a screw or nail, keeping it taut while tracing. It acts as a large-radius compass. For shorter lengths, a handmade compass will suffice; for a longer wall, the string remains the most reliable solution.
Marking Reference Points Along the Length
I recommend marking multiple reference points, for example, every 20 to 30 cm, to ensure the arc remains consistent. Also, check under grazing light: this side lighting reveals bumps and dips. This verification is crucial before finishing.
Creating the Form Support
Once the tracing is validated, it’s necessary to create the structure that will hold the curve. This is where a curved formwork or flexible profile becomes very useful. If you enjoy shaping techniques, this logic also applies to rounded finishes in coating and plasterboard.
Erecting Curved Formwork
In masonry, formwork serves as a temporary mold. It holds the mortar or concrete during setting. It must be rigid, well-secured, and follow the traced line. If it shifts, the arc collapses or deforms. This is why I always prefer to reinforce support points before pouring.
Installing a Corner or Flexible Profile
A corner is an angle profile, often made of metal or PVC, that protects and regularizes an edge. In its flexible version, it conforms to the curve without breaking the design. This is particularly useful for interior finishing, as it helps achieve a clean line without excessive touch-ups.
Adapting the Shape for Plasterboard or Masonry
In plasterboard, a curved framework is often created, and then suitable sheets are fixed. In masonry, one typically works with formwork, mortar, or concrete. The logic remains the same: maintain the shape before finishing. If you seek a more graphic style, this curve can also interact with raw materials, as seen in the basics of industrial decoration.
The most common solution for a masonry rounded wall top is mortar. The concept is straightforward: apply, level, and then correct. I can’t stress enough that it’s not about using a lot of material but rather keeping a stable shape during the setting process.
To see the correct finishing techniques, this demonstration on finishing a rounded angle is very helpful.
Applying Mortar in Layers
Work in successive layers, never trying to do everything at once. A too-liquid mortar will sag and lose the curve. Therefore, I advise applying slightly excess material and then removing the surplus gradually. This is cleaner and much more manageable.
Smoothing and Correcting the Profile
Use a curved rule, template, or block to pull the shape. Make corrections before the complete setting; otherwise, you risk breaking the profile by attempting to adjust too late. Regular checks under grazing light prevent small waves that will be visible in sunlight.
Allowing to Set Without Disturbing the Arc
The drying process is as crucial as the application. Allow the mortar to set slowly, without shocks or abrupt adjustments. If you touch it too soon, you’ll mark the surface; if you correct too late, you’ll pull away material. Therefore, I recommend planning for ample drying time before finishing.
Reminder: A well-done rounded wall top should remain consistent even after drying. Do not attempt to “save” the shape by forcing the material: this is almost always where defects appear.
How to Create an Outdoor Rounded Wall Top
Outdoors, the priority is not just aesthetics. Protecting the masonry is paramount. A well-designed rounded wall top reduces infiltration and prevents water from stagnating. This is why I recommend a finish thought out from the start for the climate and rainfall.
Planning for Water Drainage
The curve should facilitate water runoff, not allow it to pool on top. The wall’s peak should not form a bowl. If you are creating a cap, design a shape that naturally directs runoff away from the wall. This detail can significantly extend the lifespan of the structure.
Protecting the Top of the Wall from Moisture
Before applying the finish, the support must be healthy and even. A leveling layer—meaning a top layer of leveling material—may be necessary. For adhesion, double gluing involves applying adhesive on both the support and the back of the piece, enhancing adherence.
For a mineral finish, you might also draw inspiration from a lime coating on facades, especially if you seek a breathable finish.
Selecting Weather-Resistant Finishes
Outdoors, I always prioritize materials designed for water, frost, and temperature variations: concrete, stone, suitable mortar, or terracotta. Joints should be filled and smoothed to prevent water ingress. If you opt for a decorative finish, consider future maintenance: simpler surfaces tend to age better.
How to Create a Rounded Wall Top with Plasterboard
Plasterboard, commonly known as drywall, is a cardboard-covered plaster panel. To create a curve, it needs to be made more pliable or combined with an appropriate framework. This solution is ideal for interiors, especially when aiming for a soft shape without heavy masonry.
This video on an arched ceiling provides great ideas for bending and cutting plasterboard for a rounded wall top.
Bending and Fixing an Appropriate Structure
Start with a metal or wood framework that follows the curve. The rails can be regularly notched to fit the arc. The more precise the cuts, the easier the structure bends without forcing it. Then, carefully fix the sheets to avoid tension.
Using Tapes, Coatings, or Flexible Corners
The joints are treated with tapes and coatings in thin passes. A flexible corner helps maintain a clean line on the rounded area. I recommend applying only a little material with each pass: in plasterboard, it’s consistency that matters, not thickness.
Sanding for a Clean Finish
Once dry, lightly sand to remove micro-defects. Then dust before painting or applying decorative finishes. Again, grazing light is your best ally. With clean sanding, your rounded wall top immediately gains clarity and a higher level of finish.
Common Mistakes to Avoid
I recommend taking your time and following each step carefully to avoid errors that could compromise the outcome of your rounded wall top project.