How to Install Travertine Tile Flawlessly
Learn how to flawlessly install travertine tile with precise planning, appropriate materials, and expert techniques to ensure a beautiful and durable finish.
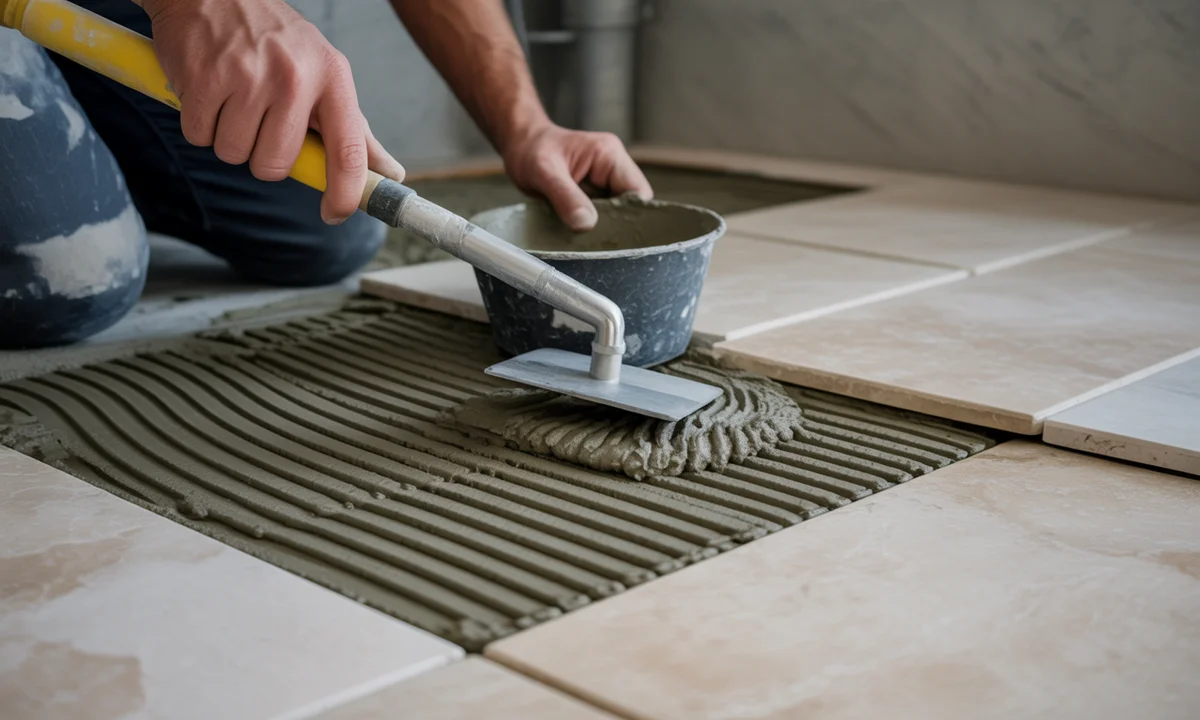
In brief:
- 💡 Planning is key: Accurate measurements, ordering an extra 10% of material, and harmonizing the colors of travertine tiles are crucial steps to prevent unpleasant surprises.
- 🛠️ Specific materials: Using an appropriate adhesive mortar (C2TE), a primer, and a waterproofing agent is essential for the porous natural stone that is travertine.
- 💧 Double gluing: This non-negotiable technique for travertine ensures optimal adhesion and prevents air bubbles.
- 📐 Joint precision: Whether using spacers or “by eye” for the Roman opus style, consistent joints guarantee both aesthetics and durability. Remember to manage the pores of the travertine for an authentic finish.
- 🛡️ Long-lasting protection: Waterproofing before grouting and regular maintenance protect your floor from stains and ensure its longevity.
Preparing for Travertine Installation: The Foundations of Expert Work ✨
Installing travertine tile, with its warm hues and unique texture, adds an unparalleled charm to any interior. However, to turn this vision into reality without setbacks, rigorous preparation is essential. This phase builds confidence and helps avoid potential missteps. In 2026, precision is no longer optional but a requirement for any renovation or construction project.
Choosing the Right Travertine: Quality, Quantity, and Color Harmony 🎨
Your project begins with selecting the travertine itself. Be cautious: the thickness of the slabs (typically between 1.5 and 3 cm for flooring) and their finish (brushed, polished, aged) will directly affect the final appearance and installation technique. Color and veining are significant aesthetic criteria. For a harmonious result, uniformity in color is crucial. Don’t hesitate to request samples to ensure the colors perfectly match your expectations.
When it comes to quantity, caution is necessary. Measure the area to be covered with great precision, then add 10 to 15% extra. Why so much? To account for cuts, potential breakages, and to give yourself a margin for error. For instance, for a room measuring 25 m², order at least 27.5 m² of travertine. Once the tiles are delivered, a frequently overlooked yet vital step is color harmonization. Travertine, being a natural stone, exhibits color variations. For a balanced appearance, lay the tiles on the ground before installation to mix the different shades from multiple palettes. This allows for a captivating interplay of light and dark tones. Also, consider ordering matching baseboards at the same time to ensure perfect coherence.
Preparing the Base: The Key to Flawless Adhesion 🏗️
The base is the foundation of your future travertine floor. It must be impeccable: perfectly clean, dry, solid, and level. For concrete slabs or screeds, meticulously check for cracks or detachment. Equip yourself with a level and a 2-meter ruler: if you detect irregularities greater than 3 mm, leveling is necessary. A self-leveling compound is often the best solution for achieving a perfectly smooth surface. The drying time can vary from 24 to 72 hours, a timeline that must be strictly adhered to. Remove all dust, paint residue, or impurities that could compromise the adhesive's grip. Lastly, don’t forget to protect your base from moisture before starting the installation of the slabs.
Selecting the Right Tools: Products and Equipment for Natural Stone 🧰
Travertine is a demanding stone that requires specific materials and tools. To avoid unpleasant surprises, choose products suitable for natural stones, ideally from a specialized retailer. Here’s what you need to have on hand:
- ✨ A primer: Essential for adhesion and regulating the absorption of the base.
- 🤝 An appropriate adhesive mortar: For travertine, a C2TE class mortar is recommended, ensuring exceptional adhesion. A thin bed (about 10 mm of adhesive) is common, but a medium bed may be necessary for tiles with larger dimensional tolerances.
- 🛡️ A waterproofing agent: Crucial for protecting the naturally porous travertine from long-term staining. This application should be renewed every four years.
- 🎨 A matching joint mortar: Color is essential! Use a light beige for Travertin Light, and a darker beige for Travertin Rustic or Noce. Ensure you have enough, as it will also be used to partially fill the pores.
- 💧 A special silicone for natural stone: For expansion joints, it should match the color of the joint mortar for perfect harmony.
- 🧼 A multi-cleaner: To remove any remaining joint mortar after installation.
On the tool side, make sure you have: adhesive isolation strips, a trowel, a notched trowel with 10 mm teeth, a rubber mallet, a mason's rule, a level, and of course, a wet saw or grinder with a diamond disc for clean cuts. Using a quality tile cutter can also make a significant difference for this type of stone.
Mastering the Installation of Travertine: Step-by-Step Technical Actions 🛠️
After meticulous preparation, it’s time for action! Installing travertine is a precision dance where every move counts to ensure the beauty and durability of your flooring. Follow these key steps for a professional result.
Applying the Primer and Isolation Strips: Initial Protections 🛡️
Start by adhering isolation strips along the walls. They serve a dual purpose: preventing adhesive from rising on the walls and reducing noise pollution. Once the base is perfectly clean, apply the primer using a brush or a paint roller. This product is vital; it ensures impeccable adhesion between the adhesive and the base while regulating its absorption capacity. Strictly adhere to the drying time indicated by the manufacturer before moving on to the next step. This is the first layer of security for your future natural stone walkway or indoor floor.
The Double Gluing Technique: Essential for Porous Stone 💧
For tiles with open pores like travertine, good adhesion is crucial. This is why the double gluing method is not only recommended but often essential. It involves applying a layer of adhesive mortar not only on the base but also on the back of each tile. Why this precaution? It significantly limits air inclusions and optimizes adhesion, ensuring a solid and durable fix.
Use a notched trowel with 10 mm teeth to spread the adhesive on the base. The goal is to achieve a uniform layer of adhesive. Visualize the technique in our video for perfect movement.
Laying the Tiles and Adjusting the Joints: Precision for Aesthetic Appeal 📏
Now it’s time to lay your tiles. Press the travertine firmly to ensure it adheres well to the adhesive bed. For regularly sized tiles (like 40×60 cm), spacers will help achieve straight joints and a uniform width, typically around 5 mm. For the opus romain style, often favored for travertine, the joint width is adjusted manually. The key is to maintain visual harmony through the rounded edges of the stone.
Constantly check the flatness of the surface with a level. After laying, a drying time (about 2-3 hours) is required before walking on the floor and removing the spacers. If you need to cut tiles, a wet saw is the ideal tool for straight and clean cuts. Avoid “sacrificing” smaller formats of the opus romain on the edges; strictly follow the laying pattern to avoid missing certain formats later. For curves (pipes, outlets), an appropriate drill accessory will be necessary. Once the slabs are in place, it’s time to consider long-term protection.
Waterproofing: A Durable Barrier Against Stains 🛡️
Before grouting, a crucial step is the waterproofing of your travertine. This protective layer will prevent stains from embedding in the natural porosity of the stone. The professional tip is to waterproof before grouting: remnants of joint mortar will be much easier to clean afterward. If the surface isn’t perfectly clean before this step, impurities may get “fixed” along with the stone, which would be detrimental to the final aesthetic. This treatment, to be renewed approximately every four years, is an investment in the longevity and beauty of your floor.
Grouting: Enhancing the Rustic Character of Travertine 🖌️
Once the waterproofing has dried, you can proceed to grouting. The width of the joints was defined during the installation. Apply the joint mortar across the entire surface, ensuring to fill not only the joints but also the natural pores of the travertine. For a tumbled travertine, the goal is to maintain its rustic effect. This means that the cavities should not be completely filled; they contribute to the natural charm of the stone. Choose a joint mortar whose color harmonizes with your travertine (light beige for Travertin Light, darker beige for Travertin Rustic or Noce). Keep in mind that with tumbled travertine, the joints may appear wider, enhancing its authentic look.
Expansion Joints and Final Cleaning: The Last Touches ✨
Don’t forget the expansion joints. These joints, typically made of special silicone for natural stone and matching the color of your tile joints, are installed at junctions between the wall and the floor, especially at the baseboards. Their role is essential: they accommodate the natural movements of the base and thus prevent cracking. For more information, consult specialized guides on expansion joints. Finally, before you can fully enjoy your beautiful floor, a final cleaning with the appropriate multi-cleaner is necessary. This last step will remove any residue from joint mortar and other dirt, revealing the full splendor of your travertine.
Maintenance and Longevity: How to Preserve the Beauty of Your Travertine ✨
Congratulations, your travertine is installed! But the work doesn’t stop there. To ensure your floor retains its elegance and resistance year after year, some maintenance practices and precautions are necessary. Preserving the beauty of natural stone is an art, and in 2026, solutions are more effective than ever.
Avoiding Mistakes: Storage and Cleanliness During the Project 🧹
Preventing stains begins well before installation. Travertine must be stored dry and never come into contact with oils, greases, or waxes before and during installation. These substances can seep into the stone’s porosity and leave stubborn marks. During installation, always have a bucket of water and a sponge on hand. Clean up any cement remnants or adhesive immediately to maintain the integrity of your travertine floor.